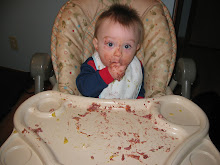
An attempt to document my progress in bringing up a healthy eater! Tyler is now a 2 year old but I will try to go back and document the entire progress of his diet. I will try to include recipes, meal ideas, and how to incorporate a child's diet into a family's lifestyle.
Beef with Adobo Peppers-The easiest slow cooking recipe on the planet.
This recipe is great. If you can use a can-opener you can make this. It is delicious, SUPER FAST, and leftovers can be shredded and used in any Mexican themed dish. To cook faster keep meat at a low boil throughout the day adding more broth if needed.
Ingredients:
Giant hunk of beef-use a shoulder roast or another roast beef. You can use cheap beef in this because it cooks for so long
1 can of chipotle peppers in adobo sauce (look in the international section at your grocery or in the Mexican section). Don't be afraid to use the whole can (small can). They smell very spicy (and can be) but mellow throughout the day.
4c beef broth
EVOO
Salt, pepper (any other spices you want to use, such as cumin)
Super easy cooking:
Heat enough EVOO to cover a heavy bottomed large pot to medium high
Brown beef
Add in broth, peppers (chop peppers if you want), and spices
Bring to boil
Lower to simmer, cover, and cook forever (or until you test the meat for your desired temp)
Product of the day: Aladdin Snack Holder- This handy snack holder has two compartments for easy snacking. For dry snacks only this container easily pops open and shut. It holds a decent amount too!
Pic from:http://www.walmart.com/catalog/product.do?product_id=9224756&sourceid=1500000000000003260370&ci_src=14110944&ci_sku=9224756
All of the dinners I will be posting recipes for can be prepared in minutes, the catch is, they need to cook all day. Although you could speed up these dishes by cooking at a hotter temperature, letting them cook for hours will bring out the full range of flavors.
Tips for speeding up cooking: Follow this order when you are prepping your food
Start with the meat!
Start heating up your pan/pot and oil right away.
Prep your meat (wash, dry, chop, whatever)
Season meat
Start cooking meat in a slightly smoking pot (to sear)
Veggies!
Wash everything
Peel everything that needs to be peeled
Chop onions and garlic, most of the time these go in the pan/pot first
Chop hard veggies (carrots, potatoes, celery), keep everything separate
Chop soft veggies (tomatoes squash), keep everything separate
Wash and chop all herbs right before putting them in the pot.
More tips for speeding up prep time!
Carrots do not have to be peeled. If you let unpeeled carrots cook all day the skin becomes just as soft as the rest of the carrot and lends some texture to the dish.
Only thick skinned (usually brown) potatoes need to be peeled. Even these can be left unpeeled if they are scrubbed very well and if they cook long enough.
Get a sideways vegetable peeler. If you have one you know that these speed up peeling time.
Get a GOOD knife and keep it sharp. We only own one good knife. It cost us around $50 at Bed Bath and Beyond. It does need to be sharpened every few times that we use it and it can not be put through the dishwasher or even left on the rack to dry.
Use the right knife for the right job. Use a larger knife for chopping hard vegetables and meats. Use a smaller knife for trimming small amounts of fat or soft veggies. Chop your tomatoes with a tomato knife, or a steak knife. It cuts right through the skin and does not smoosh your food!
A few more tips!
Fresh herbs are great if you grow them, but cost a lot in the store to buy. If you do end up buying them (or at the end of your growing season) wash them well, de-stem, and dry them, then freeze herbs in freezer bags in individual portions. This brings a fresh taste to your soups and stews.
Have 2 cutting boards. One for meat, one for veggies.
Have a bowl for scraps. An empty produce bag also works well.
Feeding babies and toddlers from a slow cooker
Cool down all food
cut into bite sized pieces, or puree for the little ones
skip the broth!
Don't over salt food when it is in the slow cooker. Instead flavor once it is on your plate
Stove vs. slow cooking
If I am going to be in the house ALL day I use the stove. It is easy to regulate the temperature and easy to cook it faster or slower. But it is not safe to leave the stove on unattended.
For slow cooking reduce the amount of liquid you use (check your owners manual) and make sure you bring it up to temp (especially if you prepare the night before and put it in the slow cooker in the morning) on high and then turn down to a lower setting.
Every slow cooker is different. For the first use, at least, be around the house to see how high it cooks on each setting and how well the lid seals and keeps in liquid.
If using a slow cooker you don’t have to brown the meat before cooking it, but the color and texture of the meat will be better if you do.
Check back frequently this week for delicious recipes!
You may have noticed a lack of posts this week. I am preparing a new format that will start next week. Each week with have a theme, next week’s will be “Meals that take all day to cook but only minutes to prepare!”. There will be 2 or 3 recipes on different days, one day of information, and on Fridays a wrap up of what Ty has been eating. Check back Sunday or Monday for the first blog entry in this format!
I love shepherd’s pie. This is a dish that might take a little time to make but can be made ahead, baked right before eating, and frozen.
A favorite of mine growing up, shepherd’s pie can actually be REALLY bad for you. Load up those potatoes with butter/cream/milk, only use corn, and use a high fat beef and you are talking an extremely starchy dinner full of fat. Here are some alternatives you can use.
Meat:
Ground turkey-this can get dry so make sure you put it on the bottom
Vegetable protein “beef” style- This stuff is great IN dishes (not really by itself). Try this with traditional shepherd’s pie spices or a little catsup mixed in.
Ground chicken
Very low fat beef
Ground lamb- a little more expensive and a tad gamey lamb is lean and healthy
Corn:
Using a small layer of corn is ok, but Shepherd’s pie does not really offer much in the way of vegetables
Mix in celery
Put in a layer of peas, green beans, roasted peppers, broccoli,or just about any other vegetable.
Mix in spinach with what ever you put in for a little more green to your pie
Potatoes:
Mashed potatoes with no butter and skim milk, add garlic for a little more flavor
Brown rice
Mashed cauliflower/potatoes (see previous blog for recipe)
Sweet potatoes
Thinner layer of traditional mashed potatoes
I am taking some liberties on what shep. Pie really is in this next section :)
Mixin’ it up, different spice and food combos:
Asian: Ground chicken with a little stir fry sauce, green beans, bean sprouts, pea pods topped with thin rice noodles also with a little stir fry sauce
Tex Mex: Throw a taco seasoning packet in with your choice of meat, roasted red peppers, corn, onions, black beans, top with potatoes
Indian: Lamb with curry spices, apple, onion, string beans, summer squash, any other veggies that are mixed with alittle curry, brown rice, top with a little chutney
The vegetarian: Vegetable protein mixed with a little catsup, green beans, ketchup, peas, mashed cauliflower
Italian: Mix up your meat with a little pasta sauce, summer squash, zucchini, brown rice, parmesan cheese.
Ty’s Breakfast Rice Pudding
This is what Ty had for breakfast this morning, it was pretty good.
Ingredients:
1 egg
1/4 to 1/3c cooked brown rice (we had leftovers)
dash of cinnamon
Dash of sugar (ty’s did not have it)
Diced fruit
Scramble egg with cinnamon (and sugar) and place into hot non stick pan
Let it cook for a few seconds and add in rice
Take off stove and add in favorite fruit
(Ty’s also had peas in it)
Cool and enjoy
This can also be made with quick oats. I have done this at work. Instead of scrambling the egg and then adding the oats, you do it all in the same bowl. You then cook it like a pancake!
These are a totally whole grain (no wheat or soy) product. Although I would classify these as not super healthy, they are easier to grab and more fun than cheerios. All organic, iron enriched, and sugar is way down on the list of ingredients these are a fun and quick snack when you are on the go!
My aunt recently posted on face book that she was looking for some fresh blueberry recipes. Here are the ones I sent her, along with the ideas I gave her, in addition to a tart recipe (which I made last night!). Anyone who wants a recipe for something not listed on here, just leave a comment and I will put it in a future post!
Sweet ideas! -Put some whipped cream on them (or even better blueberry shortcake!)
-Blueberry crumble
-Blueberry pudding
-PIE (you can even use store bought crust and make it super easy)... Read More -Blueberry French toast -Fruit Salad -Make your own blueberry yogurt
Savory Ideas -Put them on a salad -Blueberry soup -Make some sauce for chicken, fish or steak -Blueberry salsa
In a small pot boil sugar, lemon, and spices with water and blueberries
Boil for 5 min stirring constantly
remove and put in blender to puree
Cool in refrigerator
Stir in wine and yogurt garnish with small spoonful of sour cream (or more yogurt)
French toast I would actually make blueberry syrup by combining blueberries, sugar to taste, squeeze of lemon, and small amount of vanilla in a sauce pan. Cook and reduce. You can also add this to cream cheese for an awesome bagel spread.
Salsa Combine
2 c whole blueberries
1 1/2 c chopped blueberries
Jalapeno pepper, minced!
1 red pepper diced
1 small red onion diced
cilantro to taste (I hate cilantro so I leave it out)
salt to taste
1 large lemon, juiced (you could also use 1 lime instead)
Fish Sauce
Combine in a pot
1/3 c chicken stalk
¼ cup OJ
¼ c balsamic vinegar
2. Bring to a boil
3.Add rue (1T cornstarch in water) cook until thicker
4. Stir in 1c fresh blueberries
5. Pour on fish or chicken
Lemonade (yum, yum)
2 variations
1) puree in blender-3 c blueberries, 2/3c sugar, 2c fresh lemon juice. Stir into 3c cold water and ice!
2) This one is the kind the kids I watch LOVE- mix together 3c water, 3/4c lemon juice, 2T cream of coconut, 1c frozen blueberries, 1 sliced star fruit, 1/3 c sugar (or more to taste), ice!
Vinaigrette Puree 1/2c blueberries, 1 clove garlic, 1/4c red onion, 2T champaign vinegar (you can use white or white balsamic but make sure it is high quality), 1/2t sugar, and olive oil until you get the consistency you like!
I also like to add in parsley, chives, and a dash of cinnamon
Blueberry Tarts
These can be simple or complicated, depending on how much time you want to put into them.
Tart shell
Heat oven to 350 (if using store bought cookie dough follow pkg directions)
Grease a muffin pan VERY well
Cut COLD sugar cookie dough into rounds that are larger than the bottom of the muffin pan
Place rounds in pan and push down so the dough has a lip
Cook until golden brown
Cool
Remove from pan
Pudding
Make your favorite vanilla pudding (homemade is not that hard to make!)
Put in a dash of ginger
Cool in fridge
Blue Berries
Take berries and mix with a few tablespoons of apricot jam
Refrigerate
Putting it all together
RIGHT BEFORE SERVING (these will get soggy)
Place a spoonful of pudding into tart shell
Top with blueberries
You can also top with a little candied ginger if you want!
Freezing Cooked Chicken-from baby food to toddler chunks
By far the healthiest way to cook meat is to steam or poach it. I prefer to poach because I don’t have to worry about it drying out or being undercooked (you can leave it in forever). Although some meats are harder to poach, poaching chicken is quick and easy.
To poach chicken cut off any fat on the chicken breast and dump it in a pot of boiling water. Let it cook until no pink remains in the middle of the chicken and you are done! Add your favorite seasonings and you have your firs meal of poached chicken.
Chicken for beginning eaters- you can make baby chicken out of ground chicken that you sauté, but I prefer to poach and then food process the meat. When you put the chicken in the food processor make sure that it is already cut into chunks.
When you prepare chicken this way it does not get a slimy texture. Instead it becomes little granules. You can then take the chicken put it on a cookie sheet and freeze it, making chicken “sand.” I like to prepare it this way because you can then just scoop out as much of this sand as you want, add broth or what ever else you want to, and there you go! You have easy baby food. This way you also don’t have to use a set amount (such as if you froze it in an ice cube tray).
Toddler chunks- Instead of cutting the chicken, poaching it, and then freezing it, I like to poach entire breasts and then shred it. This makes the texture of the chicken more natural and a bit stringy. It is very easy to freeze this way and breaks apart well when you want to thaw.
Ty’s favorite ways to eat quick thawed chicken
When he was a baby Ty liked his chicken
-Mixed with plain whole milk (organic) yogurt
-Mixed in with a little cheddar cheese
-Rolled in with cream cheese
-With a little pepper, paprika, and garlic
Now Ty likes his chicken
-With taco seasoning
-Spicy!
-With stir fry sauce
-Mixed in with squash
My own struggle with weight loss:
If you know me you know I am not a thin woman. Recently Ty and my husband have inspired me to lose weight. I don’t want him to have an out of shape mom who eats a lot of junk food but forces the good stuff into him!
While I was breast feeding I was unable to lose a lot of weight. Each time the pounds started to come off my supply was reduced and Ty would not get enough food. So I kept myself at a constant weight.
Now that I am done breast feeding I plan on becoming a healthy weight with the help of my husband (who has recently become a healthy weight). Each week (on Fridays) I plan to weight myself and see if I dropped weight, met my goal, and evaluate my progress.
You should be happy to know that this week I dropped more weight than my goal! Yeah for me!
I have decided to leave out Ty’s menu from now on. It was a little too much work and I am sure that the only one who was interested was hi grandma :)
Recipe: Italian Stuffed chicken breasts (Serves 4)
Ingredients:
4 small chicken breasts with fat removed
1c frozen spinach (or 1 and 1/2c fresh finely chopped)
2 cloves fresh garlic, minced
1/4c finely chopped sun-dried tomatoes (re constituted in water)
1/4 c of both parmesan and mozzarella cheese
Canned or jarred pasta sauce
Fresh or dried basil, oregano, rosemary, black pepper and salt
Pre heat oven to 400F
In a bowl combine tomatoes, garlic, spinach and herbs/salt to taste.
Stir in parm. cheese
Cut a slit in the chicken breasts to be able to stuff them
Stuff veg. mixture into chicken breasts
Top chicken breasts with canned sauce and mozzarella cheese
Bake in oven until chicken is cooked (use a meat thermometer in the un-sliced thick part of the chicken to know if the temp is right.
Feel free to serve with a side of ww pasta, salad, or steamed green beans with garlic!
Other Information: Buying bread for all ages: As you can probably tell from reading my blog I am not a "no" carb. person. Carbs are part of my life, our culture, and are an easy way to incorporate many ingredients into one meal.
I have two rules for bread: 1 use whole grains (sprouted, whole wheat, ect.) and 2 keep it in moderation!
Bread products come in a variety of shapes and sizes. Each one can be cut down for the little ones, topped with foods for the older ones, cut into fun shapes and cooked with.
Mix up your shape and kind of bread to change up those boring lunches!
Try:
Pita
Tortillas (big and small, rolled, flat, or baked till crispy!
Thin wraps
Naan bread
Sandwich bread (cut in different shapes, use a cookie cutter)
Bread pockets (like Pita but thinner)
Bagels
English muffins
Dosa (like a crepe)
Chapatti (great for scooping up foods)
Chinese steamed bread or dumplings
Buns
Rolls
Bread bowls
Crisp bread
Crackers
Matzo
Vegetables at every meal Many Americans do not consume nearly enough vegetables a day. Children and adults should be eating between 3 to 5 servings, AT LEAST, a day. Meaning vegetables should be consumed at every meal and/or snack if possible.
Let’s be honest though, most vegetables are consumed at dinner in a larger quantity, which is fine. Having a salad and a large portion of broccoli can equal at least 3 servings of vegetables if not more.
Adding in vegetables for a snack or some at lunch is an easy way to push you up to that limit.
Vegetables can be consumed for every meal though. Having them on the side, the main part of a meal (such as a big salad), or combined with your food is a great way to eat them. Breakfast is probably the hardest time to incorporate vegetables so here are a few ideas.
Smoothies: Spinach, carrots, sweet potatoes, tomatoes, celery, and pumpkin all make great compliments to your morning smoothie. Most of these can be “covered up” with banana or peaches or even pineapple.
Eggs: Spinach, onions, mushrooms, broccoli, tomatoes, and all colors and kinds of peppers are traditional. You can even go a little crazy and make a south western omelet with salsa, corn, and chicken (I know not a vegetable). Or you can try a little crazier and go with green beans, tomatoes, and onions combined with a little mozzarella with a little pasta sauce for an Italian twist. Try an egg sandwich with vegetables for those meals to eat on the go (perfect for driving if you use a pita!)
Breakfast salad: Chop up tomatoes, bell peppers, and cucumbers. Top with a hard or medium boiled egg and some fresh chunks of mozzarella cheese.
Vegetable soup: Have something warm during those winter months for breakfast. Have a little side of toast and enjoy on those cold mornings. Soup can be frozen in portions in your freezer for quick thawing.
Go non-traditional- No one said you have to eat cereal and toast for breakfast. Eat your favorite leftovers from the night before; warmed up or cold (I love cold leftovers).
Not hiding vegetables (all the time) There has been a growing trend (brought on by numerous books) to hide vegetables in a child's food. I disagree with this when you are talking about the larger picture. Although adding pureed vegetables is a great way to add EVEN more of that veggie goodness to a child’s meal, they need to learn what a vegetable tastes like.
From their first bites of food children need to learn to enjoy and appreciate the taste of vegetables. Ty’s first food was (after baby cereal) sweet potatoes, then peas, then green beans. We then moved on to some fruits. To this day Ty continues to have vegetables, plain or with a light topping, on the side of almost every meal.
My mother often tells people that my favorite snack growing up was a cucumber. Even in high school and college I would chow down on a whole fresh picked cucumber as a snack (skin and all!). Even today a fresh tomato, cucumber, sliced bell pepper or carrot makes my mouth water.
Keep cheese on vegetables to a light sprinkle, dip to a minimum, sauce light and dressing lighter. Add a little squeeze of lemon juice, a sprinkle of salt and pepper or some fresh herbs. Remember, keep the topping as a compliment to the food, and don’t cover it.
Mix equal parts pureed pumpkin (from a can or prepared from a pie pumpkin, feel free to add in any spices that you would in a pumpkin pie including ginger, nutmeg, cloves, cinnamon) and cream cheese (softened or room temp)
Refrigerate until cool
Roll blobs of pumpkin mixture in baby safe granola (use your own recipe or use mine when I post it!) and/or plain quick oats!
This travels well if kept cool!
Work Recipe:
Taco Lasagna
Ingredients:
6 mini tortillas (whole wheat or whole flax are excellent in this), cut into 1in strips
1 jar of salsa (your favorite will do)
1 can of black beans
1c of cheese (low fat, something sharp like cheddar)
1lb cooked taco meat (chicken, beef, turkey with a low sodium taco spice pack added)
3 Large tomatoes sliced
Sautéed or grilled green peppers and onions (optional, but really good for you)
Pre-heat oven to 350F
Spread a light layer of salsa over the base of a large glass baking dish
Place a layer of tortilla noodles on salsa and top with 1/2 of the meat, 1/3 of the cheese, 1 sliced tomato, 1/2 of the black beans, and 1/2 of the pepper and onions mixture
Cover with salsa and another layer of tortilla noodles
Place rest of meat, peppers, another tomato, the rest of the beans, and 1/3 of the cheese on tortillas
Cover last layer of tortillas with cheese, last tomato, and a thin layer of cheese
Cook until the cheese is nice and melted and the lasagna is heated through!
Other Information:
Tyler’s First 6 months
Tyler was a breast fed baby. For the first 6 months of his life he had mommy milk from the source or pumped (with a Medela pump,see more below).
In the hospital Tyler was diagnosed with Jaundice. A common new born ailment that in Tyler’s case probably resulted from trauma during birth and bruising after. The nurses in the hospital recommended that we give Ty formula if his bilirubin levels continued to become elevated.The answer I gave them was “no.” I did not want to give my child formula unless it was absolutely necessary to his health.
We were lucky and my decision turned out to be right. After time in a UV light box, close monitoring of his bilirubin levels and time napping in a sunny spot in our house once he came home, Ty was healthy and never needed formula.
During his first month Ty would often nurse for an hour or more at a time. We found out from his pediatrician that this was because the frenulum on the bottom of his tongue was attaching his tongue to the base of his mouth near his gums. I had this small piece of skin cut when I was in elementary school and because it was traumatic for me, and because this skin was interfering with Ty’s feeding, we decided to have it cut.
The pediatrician cut it for us in less than 10 seconds. Tyler only cried while the Dr’s hands were in his mouth and there were only a few drops of blood. We gave him some Tylenol and within a few days he was nursing in 20min or less!
Tyler nursed, or had pumped breast milk, exclusively for almost the entire first 6 months. Right before he turned 6 months we tried rice cereal (iron enriched!) and he was absolutely ready. He never spit any out, he had no reflex to get it out of his mouth, and he loved it. We then slowly moved on to other foods.
Tyler nursed/had mommy milk until one day before his first birthday. I let Ty wean himself. He slowly gave up one feeding at a time, the last being the morning feeding when he woke up. I never stopped feeding him, I just never forced him to nurse.
Why we chose breastfeeding:
4 main reasons
1)COST- formula is expensive
2)Health- Breastfeeding for the first year is healthier for the infant as well as for the mom (new studies show that your risk of breast cancer is reduced)
3)Convenient- I always had food on me and I had a good pump to get food for when we wanted to go out.
4)I wanted to connect with my baby by breastfeeding
Now look, I am a huge fan of breastfeeding but I realize that some women can’t, and there are those who “can’t” (meaning it is not a medical reason but a life choice that they have made). I think every mother and family needs to decide what they can afford, what is best for their child, and what is healthiest for everyone involved.
Product of the day:
Medela Breast Pumps
http://www.medela.com/ISBD/countries.php
I am awife, mother, and Daycare Director who lives in Delaware, Ohio. I love all kinds of animals (dogs, chickens, turtles, fish, goats...pretty much everything), music, crafting and reading.
 Pic from: http://www.mexcart.com/index.php?main_page=index&cPath=1_26
 Pic from:http://www.walmart.com/catalog/product.do?product_id=9224756&sourceid=1500000000000003260370&ci_src=14110944&ci_sku=9224756